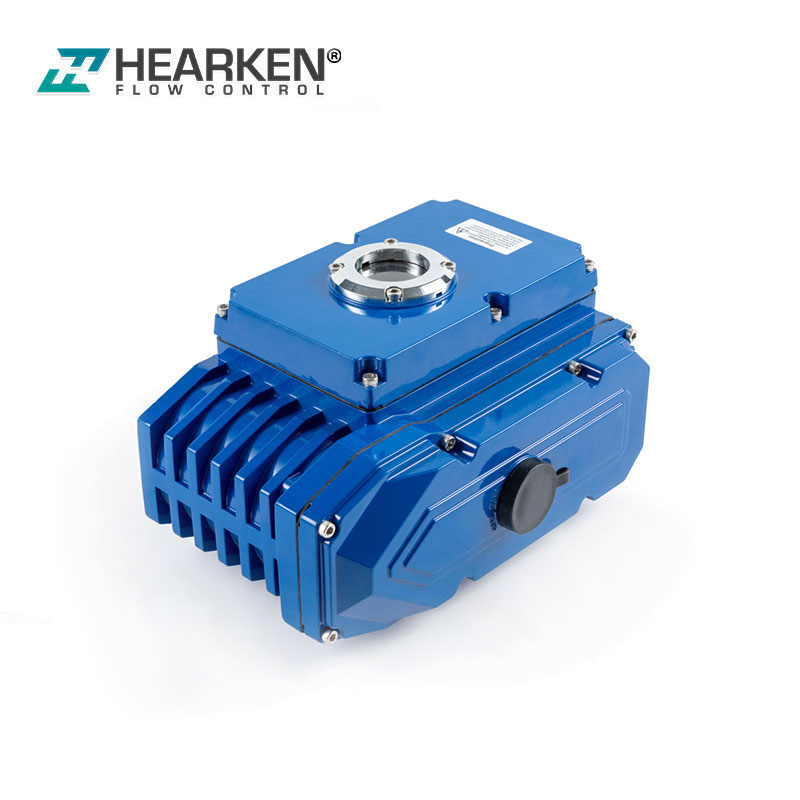
How To Install The Pneumatic Rotary Positioner On The Pneumatic Valve Actuator?
Pneumatic rotary positioner Installation :
Rotary positioner should be installed on rotary motion valve such as ball or butterfly type which uses rack and pinion, scotch yoke or other type of actuators which its stem rotates 90 degrees. Before proceeding with the installation, ensure following components are available.
Components are needed:
➢ Positioner ➢ Fork lever (Only Fork lever type) ➢ Rotary bracket set (2 pieces) ➢ 4 pcs x hexagonal headed bolts (M8 x 1.25P) ➢ 4 pcs x M8 plate washers ➢ 4 pcs x wrench headed bolts (M6 x 1P x 15L) ➢ 4 pcs x M6 nuts ➢ 4 pcs x M6 spring washers ➢ Bolts and washers to attach bracket to actuator – not supplied with the positioner
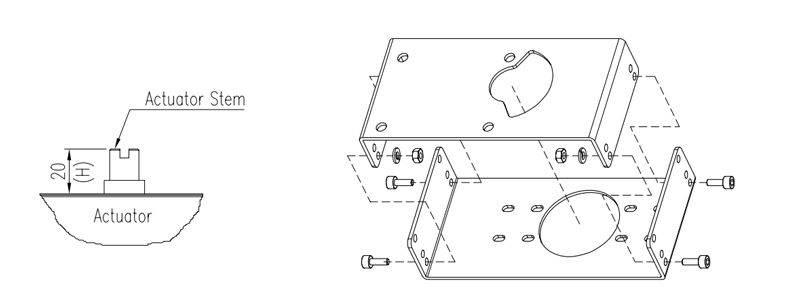
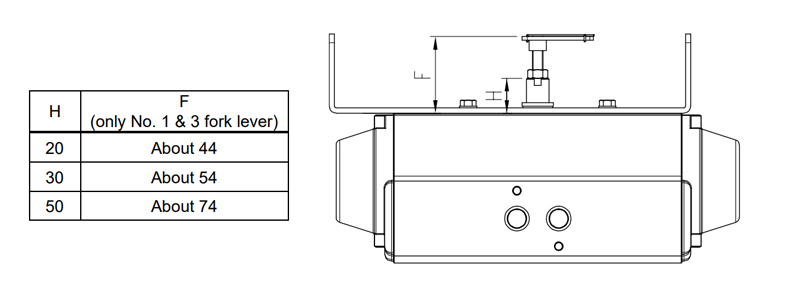
Rotary Bracket Information The rotary bracket set(included with the positioner) contains two components. The bracket is designed to fit onto the actuator with 20mm, 30mm and 50mm stem height (H) according to VDI/VDE 3845 standard. Please refer to below figures how to adjust the height of the bracket.
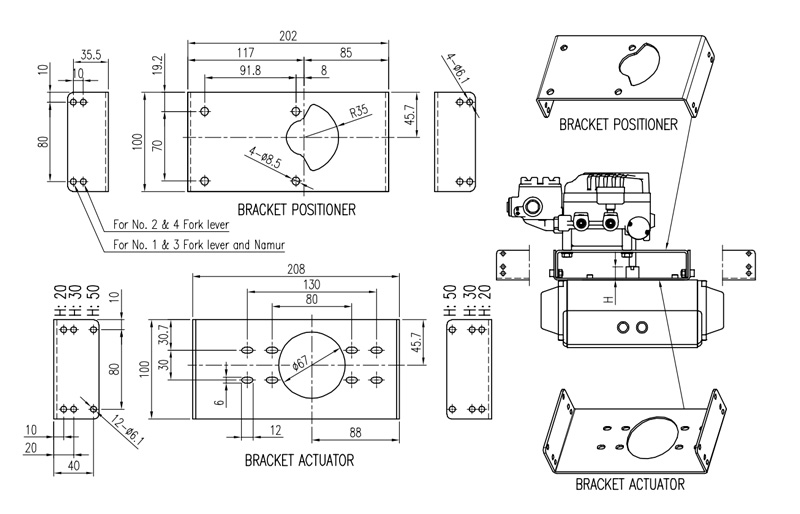
Rotary positioner Installation Steps 1) Please check the actuator’s stem height and adjust the brackets by referring to the above bracket figures.
2) Attached the brackets onto the actuator. It is recommended to use spring washer so the bolts will not be loosen from vibration.
3) Set rotation position of the actuator stem at 0%. For single acting actuator, it is easy to check 0% point by supplying no pressure to the actuator. For double acting actuator, check actuator stem’s rotation direction – clockwise or counter-clockwise - by supplying pressure to the actuator.
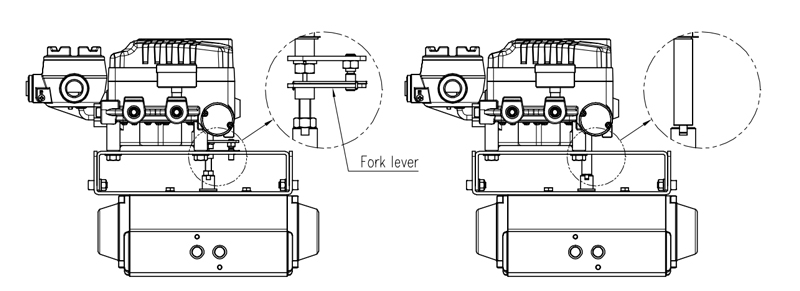
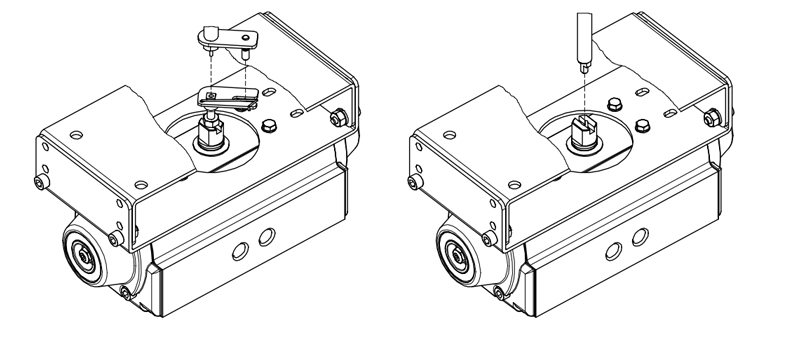
4) (Only Fork lever type) Install the fork lever after setting actuator’s stem at 0%. Check the actuator stem’s rotation direction – clockwise or counter-clockwise. Installation angle of the fork lever should be 45˚ to the longitudinal direction of the actuator.

5) (Only Fork lever type) After determining fork lever direction, adjust F between the top plate of fork lever and the top face of actuator as below table. Fasten lock nuts which are located on the bottom of the fork lever.
6) Attach the positioner to the bracket. Setting alignment of center of main shaft of the positioner and center of the actuator’s stem is very important. Poor alignment of the main shaft and the actuator’s stem decreases the positioner’s durability due to unnecessary forces on the main shaft.
7) Tighten the positioner and the bracket with bolts after checking the positioner’s position.
Please feel free to contact with us for more information of rotary positioner.